
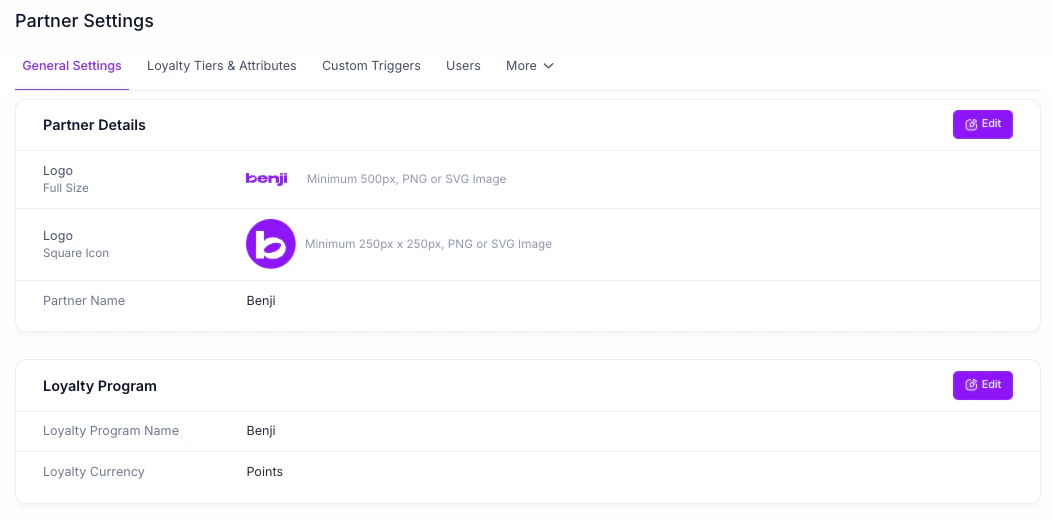
General Settings
Configure your basic program information and branding. Partner Details Click Edit to update your branding:- Logo (Full Size): Your loyalty program’s full logo (minimum 500px, PNG or SVG)
- Logo (Square Icon): Square icon version (minimum 250px x 250px, PNG or SVG)
- Partner Name: Display name for your loyalty program
- Loyalty Program Name: Name of your loyalty program
- Loyalty Currency: The currency used for rewards (e.g., Points, Miles)
Loyalty Tiers & Attributes
Define your loyalty program’s tier structure and custom member attributes. Loyalty Tiers Define your loyalty program’s tier structure. Click New Tier to add a tier:- Your ID: The tier identifier in your system
- Status Tier Name: Display name for the tier
- Base Tier: Check this box to set as the base tier
- Attribute Name: Display name for the attribute
- Your ID: The attribute identifier used in your system
- Attribute Type: Data type for the attribute
- Text: A single string value. Can optionally be restricted to a defined list of allowed values, each with its own display label, so a raw value received from your system can be shown as a friendly label.
- Number: An integer or decimal value. Supports comparison operators such as equals, greater than, less than, and between when used in campaigns.
- Boolean: A true or false value, with optional custom labels for the true and false states.
- Date: A calendar date value. Supports date based comparisons when used in campaigns.
- Multi Value: Holds more than one value at once for a given member, chosen from a defined list of allowed values that you configure up front.
An attribute belongs to the partner that defines it and is visible in any partnership that partner participates in. When both partners in a partnership define attributes, each is shown separately and labeled by its source, so a campaign condition always references a specific source attribute.
Custom Triggers
Configure custom triggers for use in campaigns with the Custom Action trigger type. Custom triggers provide flexibility to create campaigns for use cases not covered by standard trigger types, for example, Spend Per Dollar, Registration, or Customer Referral. Click New Trigger to create a custom trigger:- Name: Display name for the trigger
- Trigger Value: The identifier sent when triggering the campaign via API
- Description: Description of when this trigger should be used
Redemption Codes
The Redemption Codes tab lets you manage a pool of pre-generated codes for a partner. It appears only for partners that have an eligible product. If you do not see the tab, the partner has no eligible product associated. The tab shows all uploaded codes in a table with the following columns:- Date Uploaded: When the code was added
- Product Variant: The product variant the code belongs to
- Redemption Code: The code value
- Status: The current state of the code
- Action: Per row actions, described below
Uploading and deleting codes are permissioned actions. View-only users can see the codes and their status but cannot upload or delete. In a partnership context these follow partnership edit permissions, and in Partner Settings they follow partner settings edit permissions.
Users
Manage administrator access for your loyalty program. Click Invite New User to grant users access to manage campaigns and settings for your program.Allowed Collaborators
Account Admins control which email addresses can be invited as collaborators on partnerships. This is managed from Partner Settings.- Email domains: Add approved domains. Any email at an approved domain can be invited.
- Individual email addresses: Add specific pre-approved addresses for exceptions, such as a consultant using a personal email.